5 Stunning New Year’s Cake Decorating Ideas
As the clock ticks down to midnight and the world prepares to welcome a brand-new year, one sweet tradition stands tall at every celebration — the cake. More than just a dessert, the New Year’s cake has evolved into a canvas for creativity, a symbol of fresh beginnings, and a centerpiece that embodies the spirit of the season. Whether you’re hosting a glamorous countdown party or enjoying a cozy gathering with loved ones, a beautifully decorated cake can elevate the entire experience.
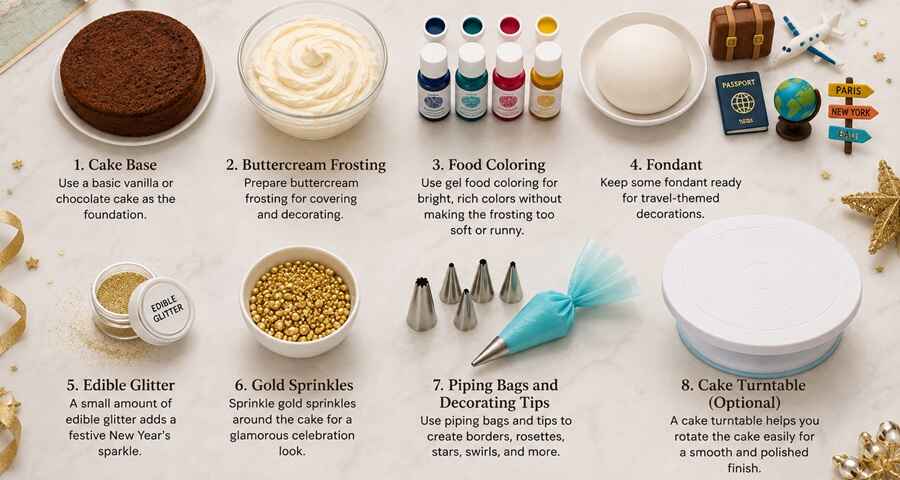
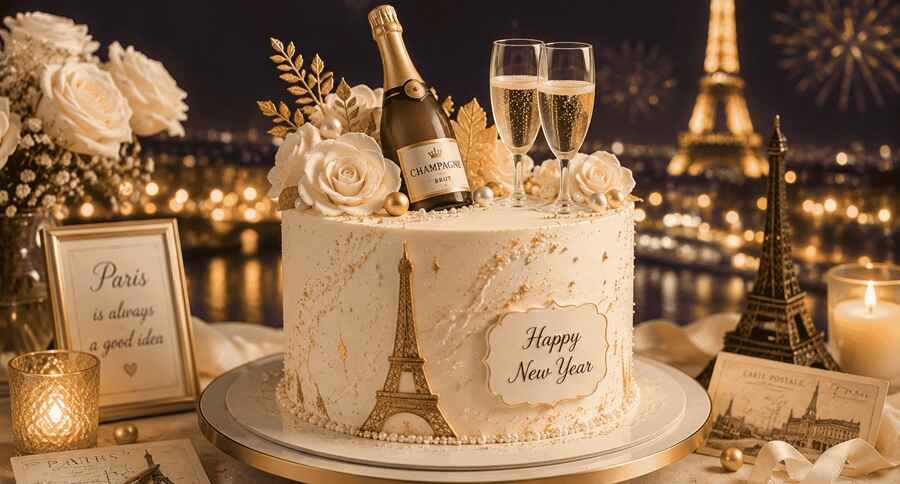
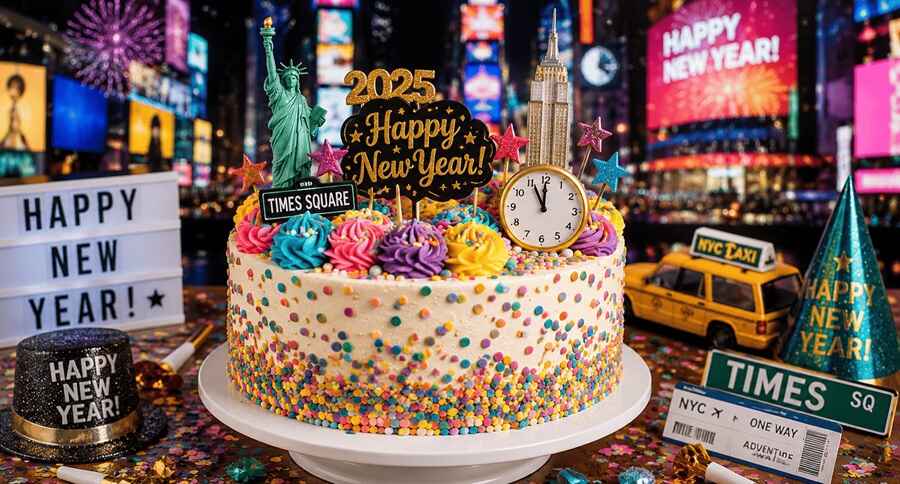
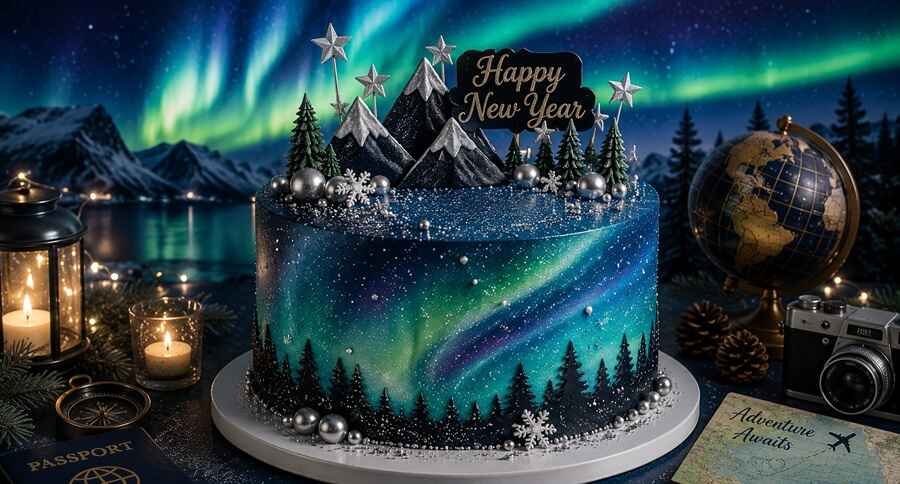
With the rise of DIY baking and home celebrations, cake decorating has taken on a whole new level of excitement. From shimmering metallic finishes to playful toppers and bold color palettes, there’s no shortage of ways to make your cake reflect your hopes, dreams, and style for the year ahead. In this post, we’re going to show you some really cool and inspiring “New Year’s Cake Decorating Ideas” that will help you make a cake that everyone will say “wow!” to. Get ready to find some amazing “New Year’s Cake Decorating Ideas” to make your celebration extra sweet and sparkly!
1. Metallic Gold Cake Recipe

Celebrate in style with this showstopping cake that radiates glamour and festivity. With rich vanilla layers, silky buttercream, and a dazzling edible gold finish, this cake is designed to be the centerpiece of your celebration.
Ingredients for Metallic Gold Cake
For the Vanilla Cake (Three Tiers)
- 3 ¾ cups all-purpose flour
- 1 tbsp baking powder
- ¾ tsp salt
- 1 ½ cups unsalted butter (room temperature)
- 2 ½ cups granulated sugar
- 6 large eggs
- 1 tbsp vanilla extract
- 1 ½ cups whole milk
For the Buttercream Frosting
- 2 cups unsalted butter (room temperature)
- 8 cups powdered sugar
- 4–6 tbsp heavy cream
- 2 tsp vanilla extract
- Pinch of salt
For the Edible Gold Finish
- Edible gold luster dust or metallic icing
- 2 ¼ tsp lukewarm water
- Optional: Edible gold spray for extra shine
- Edible gold flowers and leaves (store-bought or handmade with fondant)
- Black fondant plaque with gold lettering (“NEW YEAR”)
Instructions for Metallic Gold Cake
Step 1: Bake the Cake Layers
- Preheat oven to 350°F (175°C). Grease and flour three cake pans (6-inch, 8-inch, and 10-inch).
- Whisk flour, baking powder, and salt in a bowl.
- In a separate bowl, cream butter and sugar until fluffy.
- Add eggs one at a time, then stir in vanilla.
- Alternately add dry ingredients and milk, mixing until smooth.
- Divide batter into pans and bake for 30–35 minutes. Cool completely.
Step 2: Make the Buttercream
- Beat butter until creamy.
- Gradually add powdered sugar.
- Add vanilla, salt, and cream until smooth and spreadable.
- Apply a crumb coat to each tier, chill, then frost smoothly.
Step 3: Apply the Metallic Gold Finish
- Mix 2 ¼ tsp lukewarm water with edible gold luster dust to create a paint-like consistency.
- Use a soft brush to paint the entire cake surface with gold.
- For extra shine, lightly mist with edible gold spray.
Step 4: Decorate
- Attach edible gold flowers and leaves to the top and sides.
- Create a black fondant plaque and use edible gold paint or lettering to write “NEW YEAR.”
- Place the plaque on the middle tier.
Tips for a Flawless Finish
- Chill the cake before painting to prevent smudging.
- Use high-quality edible metallics for vibrant color.
- Add gold sugar pearls or glitter for extra sparkle.
2. Clock Cake Recipe
Ring in the New Year—or mark a special moment—with this elegant clock cake that’s as delicious as it is dazzling. With its Roman numeral face, golden accents, and midnight magic, this cake is a showstopper that tells a story with every slice.
Ingredients Clock Cake
For the Cake Layers:
- 2½ cups all-purpose flour
- 2½ tsp baking powder
- ½ tsp salt
- 1 cup unsalted butter (room temperature)
- 2 cups granulated sugar
- 4 large eggs
- 1 tsp vanilla extract
- 1 cup whole milk
For the Buttercream Frosting:
- 1 cup unsalted butter (room temperature)
- 4 cups powdered sugar
- ¼ cup heavy cream
- 1 tsp vanilla extract
- Gel food coloring: cream, black, and gold
For Decoration:
- Edible gold paint
- White spherical candies (like sugar pearls)
- Golden sugar crystals
- Edible gold star decorations
Instructions for Clock Cake
1. Bake the Cake
- Preheat oven to 350°F (175°C). Grease and flour two 9-inch round cake pans.
- In a bowl, whisk flour, baking powder, and salt.
- In a separate bowl, beat butter and sugar until fluffy. Add eggs one at a time, then mix in vanilla.
- Alternately add the flour mixture and milk to the butter mixture. Mix until just combined.
- Divide batter between pans and bake for 25–30 minutes. Cool completely.
2. Make the Frosting
- Beat butter until creamy. Gradually add powdered sugar.
- Add cream and vanilla, beat until fluffy.
- Tint portions of the frosting: use cream for the base, black for the clock details, and leave some white for accents.
3. Assemble & Decorate
- Stack and frost the cake with cream-colored buttercream.
- Pipe Roman numerals and clock hands using black frosting (set to 11:55 for dramatic effect).
- Paint vertical gold columns on the sides using edible gold paint.
- Decorate the base with white candies and golden sugar crystals.
- Add gold stars around the cake for sparkle.
Let the cake sit for 30 minutes before serving. Pair it with champagne or sparkling cider for a full countdown experience!
3. Champagne Bottle Cake Recipe

Celebrate the New Year or any milestone with this showstopping Champagne Bottle Cake. Designed to resemble a real bottle of bubbly, this cake combines rich vanilla flavor with champagne-infused sweetness, wrapped in golden fondant and festive flair.
Ingredients for Champagne Bottle Cake
For the Champagne Cake Batter
- 2 cups all-purpose flour
- 1½ cups granulated sugar
- 1 cup unsalted butter (softened)
- 4 large eggs
- 1 cup champagne or sparkling wine
- 1 tsp vanilla extract
- 1 tsp baking powder
- ½ tsp baking soda
- ¼ tsp salt
- Yellow gel food coloring (for bottle color)
For the Buttercream Frosting
- 1 cup unsalted butter
- 4 cups powdered sugar
- 2–3 tbsp champagne (optional)
- 1 tsp vanilla extract
- Pinch of salt
For Decoration
- Yellow fondant (for bottle body)
- Black fondant (for ribbon and label)
- Red fondant (for seal)
- Edible gold dust or spray
- Optional: Mini disco balls, sugar pearls, or edible glitter
Instructions for Champagne Bottle Cake
Step 1: Bake the Cakes
- Preheat oven to 350°F (175°C). Grease and flour a large bottle-shaped cake pan and several small bottle molds.
- Cream butter and sugar until light and fluffy.
- Add eggs one at a time, beating well. Stir in vanilla and champagne.
- In a separate bowl, whisk flour, baking powder, baking soda, and salt.
- Gradually mix dry ingredients into wet. Add yellow food coloring to achieve the champagne bottle hue.
- Pour batter into pans, filling each about ⅔ full. Bake for 25–30 minutes or until a toothpick comes out clean.
- Cool cakes completely before decorating.
Step 2: Prepare the Buttercream
- Beat butter until creamy. Add powdered sugar gradually.
- Mix in vanilla, salt, and champagne (if using) until smooth and fluffy.
Step 3: Assemble & Decorate
- Cover the large cake with yellow fondant, smoothing it to mimic the texture of the bottle.
- Use black fondant to create the ribbon and label. Add red fondant for the seal.
- Brush edible gold dust or spray over the bottle for a luxe finish.
- Decorate mini cakes similarly, and arrange them around the main bottle.
- Add sprinkles or crumbs for a festive presentation.
To achieve a flawless finish when decorating your Champagne Bottle Cake, it’s essential to chill the cake before applying fondant. A cold cake helps the fondant adhere smoothly and prevents tearing or sagging, especially when working with curved surfaces like bottle shapes. For accuracy and realism, use a real champagne bottle as a visual reference while shaping your cake—this ensures the proportions, curves, and label placement feel authentic and eye-catching. Finally, add a personalized fondant plaque with a celebratory message like “Cheers” or “2026” to give your cake a festive and custom touch. It’s a simple detail that elevates the design and makes your creation truly memorable.
4. Chocolate Lava Cake Recipe
Chocolate Lava Cake with “Exploding” Sprinkle Center is a Rich chocolate cake with a gooey molten center, hiding a surprise burst of colorful sprinkles inside. Slice it open at midnight for a dramatic reveal that mimics fireworks and celebration.
Ingredients for Chocolate Lava Cake (Serves 4)
- ½ cup (115g) unsalted butter
- 6 oz (170g) high-quality semi-sweet chocolate (chopped)
- 1 cup (120g) powdered sugar
- 2 large eggs
- 2 large egg yolks
- 1 tsp vanilla extract
- ½ cup (65g) all-purpose flour
- Pinch of salt
- 2 tbsp rainbow sprinkles (plus extra for garnish)
- Vanilla ice cream (for serving)
Instructions for Chocolate Lava Cake
- Prep the ramekins
Grease four 6-ounce ramekins with butter and dust with cocoa powder. Preheat oven to 425°F (220°C). - Melt the chocolate & butter
In a microwave-safe bowl, melt butter and chocolate in 30-second intervals, stirring until smooth. - Mix the batter
Whisk in powdered sugar until combined. Add eggs and yolks one at a time, whisking well. Stir in vanilla. - Add dry ingredients
Gently fold in flour and salt until just combined. The batter will be thick. - Add a sprinkle of surprise
Spoon half the batter into each ramekin. Add a small spoonful of sprinkles in the center, then cover with remaining batter. - Bake
Place ramekins on a baking sheet and bake for 12–14 minutes. Edges should be firm, center soft. - Serve
Let cool for 1 minute. Invert onto plates, garnish with extra sprinkles, and serve immediately with vanilla ice cream.
This version adds a playful twist to the classic lava cake—perfect for celebrations or New Year’s parties.
5. Vanilla Confetti Cake Recipe

This cake is pure happiness in every bite. With a soft vanilla sponge, rainbow sprinkles baked right in, and a cloud of fluffy buttercream frosting, it’s a party on a plate. The edible glitter and sprinkle-covered sides make it a visual treat that’s as fun to make as it is to eat.
Ingredients for Vanilla Confetti Cake
For the Cake
- 2½ cups all-purpose flour
- 2½ tsp baking powder
- ½ tsp salt
- 1 cup unsalted butter, room temperature
- 1½ cups granulated sugar
- 4 large eggs, room temperature
- 1 tbsp vanilla extract
- 1 cup whole milk, room temperature
- ½ cup rainbow sprinkles (jimmies work best)
For the Buttercream Frosting
- 1 cup unsalted butter, room temperature
- 4 cups powdered sugar
- ¼ cup heavy cream
- 2 tsp vanilla extract
- Pinch of salt
For Decoration
- Additional rainbow sprinkles
- Edible glitter or powdered sugar (optional)
Instructions for Vanilla Confetti Cake
1. Bake the Cake
- Preheat oven to 350°F (175°C). Grease and flour two 9-inch round cake pans.
- In a medium bowl, whisk together flour, baking powder, and salt.
- In a large bowl, beat butter and sugar until light and fluffy (about 3–4 minutes).
- Add eggs one at a time, beating well after each. Stir in vanilla.
- Alternately add dry ingredients and milk to the butter mixture, beginning and ending with dry.
- Gently fold in the sprinkles.
- Divide batter evenly between pans and smooth the tops.
- Bake for 25–30 minutes or until a toothpick inserted in the center comes out clean.
- Cool in pans for 10 minutes, then transfer to wire racks to cool completely.
2. Make the Frosting
- Beat butter until creamy.
- Gradually add powdered sugar, heavy cream, vanilla, and salt.
- Beat until light and fluffy (about 3–4 minutes).
3. Assemble & Decorate
- Place one cake layer on a cake stand. Spread frosting on top.
- Add the second layer and frost the top and sides.
- Press sprinkles onto the sides and sprinkle more on the top edge.
- Lightly dust with edible glitter or powdered sugar for sparkle.
For a vibrant and mess-free finish, opt for jimmies—those long, rod-shaped sprinkles—when adding color to your cake batter. Unlike nonpareils, jimmies are less likely to bleed during baking, helping maintain crisp, cheerful hues throughout the cake. Before decorating, be sure to chill the cake thoroughly. A cold cake holds its shape better, allowing for cleaner edges and smoother application of frosting or fondant. To complete the celebration, serve your cake with a scoop of vanilla ice cream or a glass of sparkling cider. These festive pairings not only enhance the flavor but also elevate the overall experience for your guests.
Instagram-Worthy Presentation Tips
Make your cake the star of the feed with presentation that pops. These styling tricks will elevate your dessert from delicious to dazzling:
Use black or mirrored cake stands
These create a striking contrast and make metallic or brightly colored cakes stand out beautifully in photos.
Add sparklers or LED lights
A few well-placed sparklers or battery-powered fairy lights can turn your cake into a glowing centerpiece, especially perfect for midnight countdowns.
Style with New Year’s props
Surround your cake with festive items like party hats, confetti, champagne flutes, and mini clocks to create a celebratory scene that’s ready for the ‘gram.
DIY Tips for Beginners
Even if you’re new to cake decorating, these beginner-friendly tips will help you create a masterpiece with confidence:
Easy piping techniques
Use star and round tips to create rosettes, dots, and borders. Practice on parchment paper before decorating your cake.
Using edible gold leaf safely
Apply with tweezers or a dry brush. Make sure your cake is slightly chilled so the gold leaf adheres cleanly without tearing.
Buttercream layering hacks
Chill each layer before stacking. Use an offset spatula and a bench scraper for smooth sides and sharp edges.
Budget-friendly decorations
Use store-bought toppers, sprinkles, and fondant accents. Even simple items like chocolate coins or glitter candles can add a festive touch without breaking the bank.
Conclusion
New Year’s cake decorating is more than just baking—it’s a chance to express your hopes, creativity, and celebration style. Whether you go bold with metallics or playful with sprinkles, your cake can be a reflection of your personal countdown to joy. So grab your piping bag, sprinkle some magic, and share your masterpiece with the world. Don’t forget to tag us @YourBlogHandle and use #NewYearsCakeArt—we’d love to feature your creations!
Read More: