Travel-Inspired Gold Glitter Cake: A Luxury Dessert You Can Make at Home

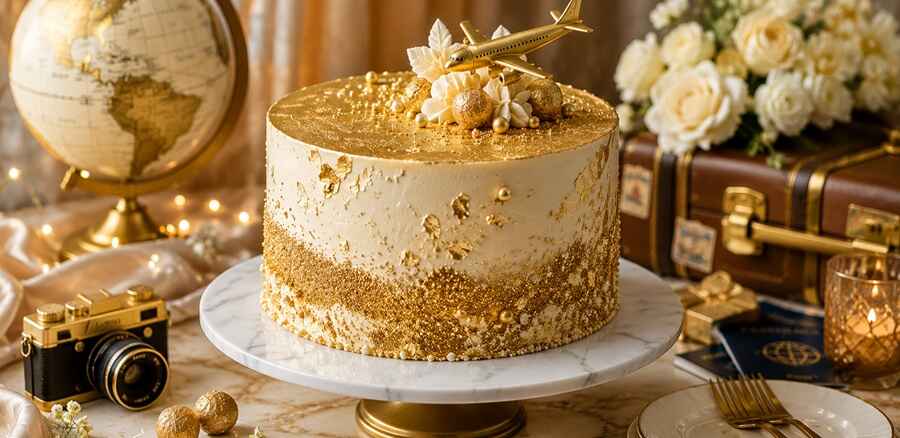
Travel can inspire more than just your next destination. Beautiful cities, luxury hotels, colorful cafés, sunsets, and unforgettable meals can also inspire the way we celebrate special moments at home.
A travel-inspired gold glitter cake is a simple way to bring that feeling into a birthday, New Year’s Eve party, graduation, anniversary, or travel-themed celebration.
You don’t need professional cake-decorating skills or an expensive setup. A simple homemade or store-bought cake, smooth buttercream, and a few carefully chosen edible decorations can create an elegant result.
In this guide, you’ll learn how to decorate a travel-inspired gold glitter cake at home, including the supplies you need, five easy decorating steps, travel-themed design ideas, food-safety tips, and simple ways to personalize your cake.
If you are looking for more creative ideas for a New Year celebration, you can also explore these 5 Easy New Year’s cake decorating ideas for travel lovers.
Why Gold Works So Well for a Travel-Themed Cake
Gold is commonly associated with celebration and elegance. A few gold accents can make a simple cake look more festive without requiring complicated decorations.
The key is balance.
Instead of covering the entire cake in gold, keep the main cake white, cream, or another soft color and use gold on selected areas.
This creates contrast while allowing the travel decorations to stand out.
Gold also photographs well under party lighting, making it a nice choice for celebrations where you plan to take photos.
For a fruit-based dessert, check out this Blueberry Cheesecake Recipe from Your Travels.
Travel-Themed Cake Styling Ideas
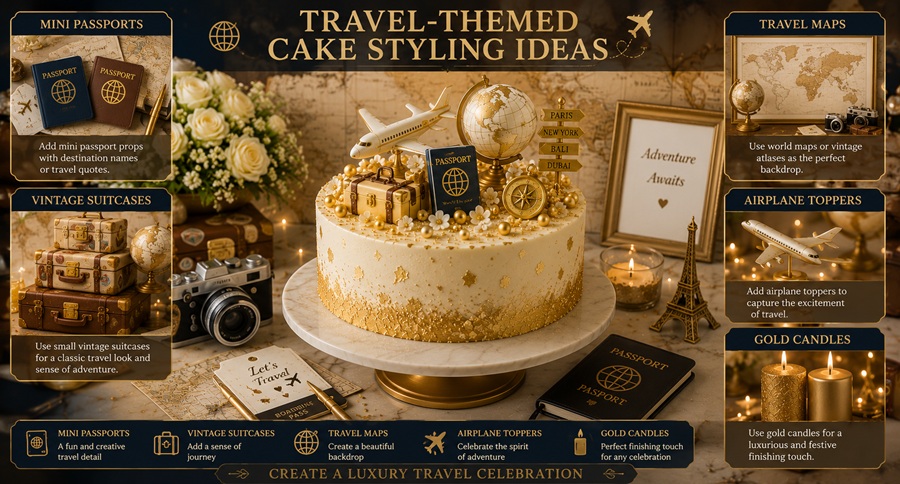
You can turn a simple gold cake into a travel-inspired centerpiece with a few small details.
Consider using:
- Mini airplane decorations
- Travel tags
- Suitcase shapes
- World-map designs
- Globe decorations
- Passport-inspired details
- Stars
- Destination signs
- Simple city or landmark shapes
You can also place travel-related props around the cake rather than directly on it. A small globe, camera, suitcase, postcard, or map can help complete the display.
Tip: Don’t use every travel symbol at once. Choosing two or three related details usually creates a cleaner design.
How to Make a Travel-Inspired Gold Glitter Cake
1. Quick Cake Decorating Overview
- Difficulty: Easy to moderate
- Main style: White, cream, and gold
- Best for: Birthdays, New Year’s Eve, anniversaries, graduations, and travel-themed parties
- Decoration time: About 30–60 minutes, depending on the design
- Cake type: Vanilla or chocolate
- Main decorating technique: Buttercream smoothing and edible gold accents
The exact decorating time will depend on whether you make the cake and buttercream from scratch or start with a prepared cake.
2. Ingredients and Decorating Supplies
Before decorating, prepare everything you need.
Cake and Frosting
- 1 vanilla or chocolate cake
- Buttercream frosting
You can use a homemade cake or a prepared cake if you want to focus mainly on decorating.
Gold Decorations
- Edible gold luster dust
- Edible gold leaf, optional
- Gold sprinkles
- Edible gold pearls
Decorating Tools
- White fondant, if desired
- Piping bags
- Decorating tips
- Offset spatula
- Cake scraper
- Cake turntable, optional
- Small clean food-safe brush
Only use gold glitter, luster dust, gold leaf, sprinkles, and other decorations that are clearly labeled edible and intended for food use.
Some products sold as “glitter,” “dust,” or decorative shimmer are designed only for visual decoration and are not meant to be eaten.
Always check the product label and follow the manufacturer’s instructions before using a decorating product on food.
3. Step-by-Step Gold Glitter Cake Decorating
Step 1: Prepare the Cake
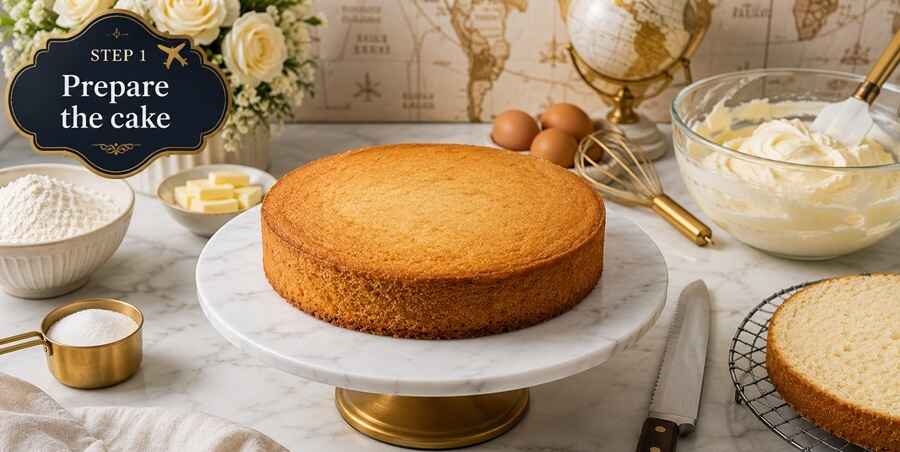
Make sure the cake layers are completely cool before you begin decorating. If the cake is still warm, the buttercream can soften, making it difficult to create a smooth finish.
If necessary, use a serrated knife or cake leveler to carefully even out the cake layers. Place the first layer on your cake board or serving surface.
Spread an even layer of buttercream over the top. Add the next cake layer and repeat the process if you’re using multiple layers.
Try to keep the layers level as you build the cake. A stable cake makes every decorating step easier.
Step 2: Apply the Crumb Coat
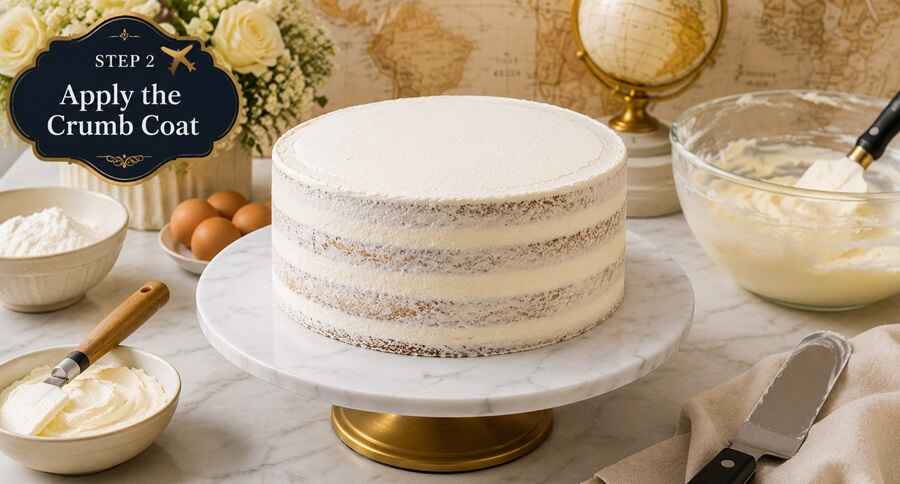
The crumb coat is a thin layer of buttercream that helps trap loose cake crumbs. Using an offset spatula, spread a thin layer of buttercream over the top and sides of the cake.
It doesn’t have to look perfect. The goal is simply to cover the cake and create a clean base for the final frosting layer.
Place the cake in the refrigerator for around 20–30 minutes, or until the buttercream is firm enough to handle. Once set, you’re ready for the final coat.
Step 3: Add Smooth Buttercream
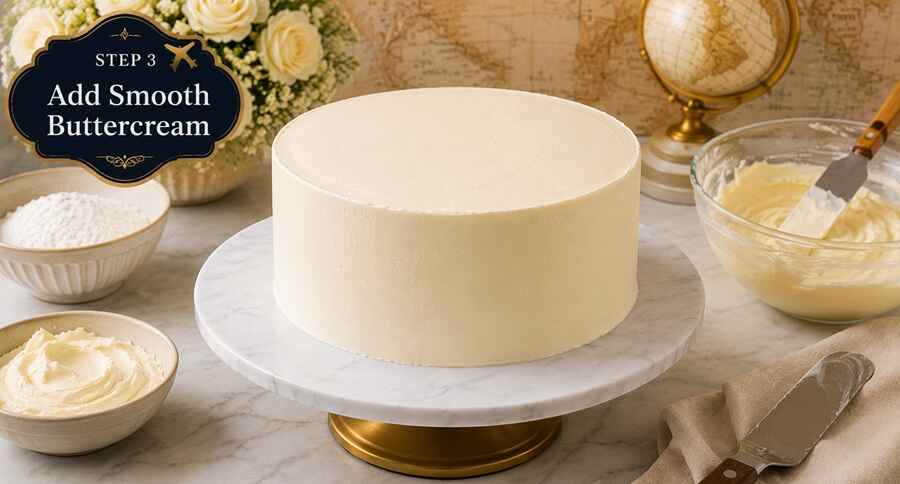
After the crumb coat is cold and firm, add a thicker layer of buttercream over the chilled crumb coat.
Cover the top and sides evenly.
Use a cake scraper to smooth the sides while slowly turning the cake. An offset spatula can help smooth the top.
Don’t worry if you need to repeat this process several times.
The smoother the buttercream surface, the cleaner your gold details will look.
For a classic travel-inspired style, try:
White + Gold for an elegant look
Cream + Gold for a warm, soft look
Navy + Gold for a sophisticated travel theme
Soft Blue + Gold for an airy destination-inspired design
Leave some areas free of decoration. The contrast between the plain buttercream and gold accents is part of what makes the design attractive.
Step 4: Create the Gold Shimmer Effect
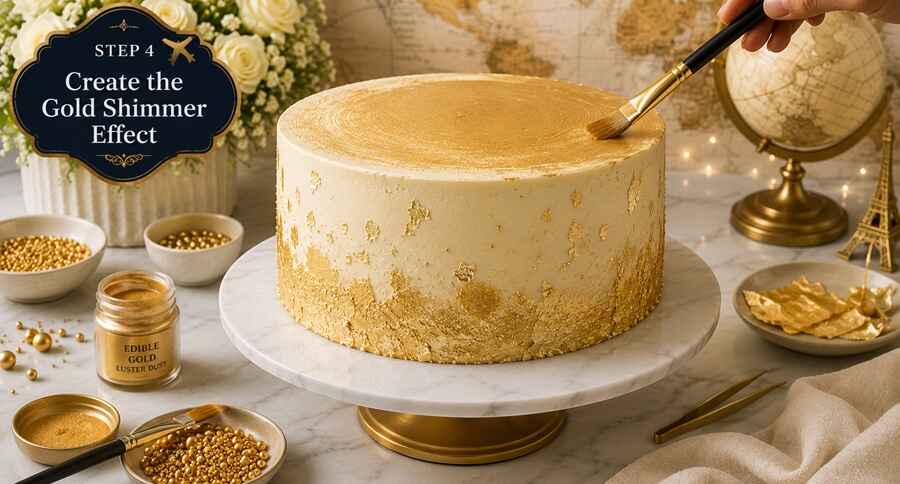
Now it’s time to add the signature gold detail.
Use edible gold luster dust according to the product’s instructions.
Depending on the specific product, the dust may be designed for dry application or for mixing with an appropriate edible decorating medium.
If the instructions allow it to be used as an edible paint, prepare it exactly as directed and apply it with a clean, food-safe brush.
You can add gold to:
- Cake edges
- Buttercream swirls
- Raised decorations
- Small sections of the sides
- Fondant travel shapes
- Decorative borders
For additional sparkle, you can add edible gold leaf, gold pearls, or gold sprinkles where appropriate.
Don’t Overdo the Gold
You don’t need to cover the entire cake.
A few carefully placed gold details can have more visual impact than a cake covered from top to bottom.
Keeping some white or cream buttercream visible also helps the travel decorations stand out.
Step 5: Add the Final Travel Decorations
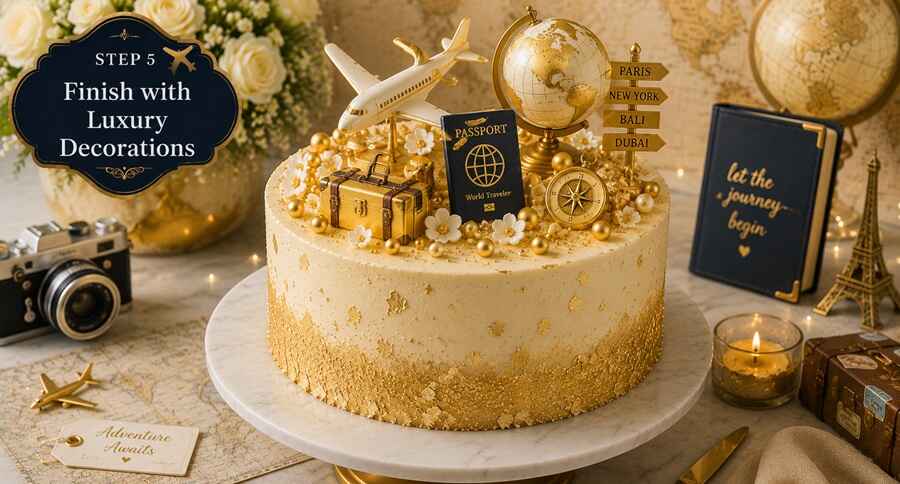
Once the gold details are finished, add your travel-inspired decorations.
You can create simple shapes from suitable edible fondant or use ready-made edible decorations.
Try:
- Airplanes
- Luggage tags
- Passports
- Globes
- Stars
- Suitcases
- Travel maps
Choose decorations based on the story you want the cake to tell.
For example, a cake celebrating a recent trip could feature the destination name or a small symbol associated with that place.
Keep the number of decorations limited so the cake doesn’t become visually crowded.
Simple Tips for a Better Luxury Look
You don’t need complicated techniques to create a polished result.
1. Keep the Buttercream Smooth
A smooth surface creates a clean background for gold decorations.
2. Use a Limited Color Palette
Two or three complementary colors are usually enough.
3. Don’t Cover Every Surface
Leaving some empty space makes the decorations easier to see.
4. Match Decorations to Cake Size
Large decorations can overwhelm a small cake, while tiny decorations may disappear on a large cake.
5. Use Edible Decorations Carefully
Always confirm that anything touching the cake is suitable for direct food contact and is intended to be eaten when appropriate.
6. Plan Your Design Before Decorating
Place your decorations beside the cake first so you can decide where everything should go.
Frequently Asked Questions
Can I use regular craft glitter on a cake?
No. Only use decorating products that are clearly labeled for food use and edible when they are intended to be eaten. Craft glitter or decorative products may not be suitable for consumption.
Do I need a cake turntable?
No. A turntable can make smoothing buttercream easier, but you can decorate a cake without one.
Can I use a chocolate cake instead of vanilla?
Yes. Chocolate and vanilla both work well. A lighter buttercream can provide strong contrast with the gold decorations.
How can I make the cake look less crowded?
Use fewer decorations and leave some of the buttercream visible. Choosing one main travel theme can also help create a cleaner design.
Can I make the cake ahead of time?
Yes, but the exact storage method depends on the cake, frosting, fillings, and decorations you’re using. Follow appropriate food-storage guidance for the ingredients in your particular cake.
Conclusion
A travel-inspired gold glitter cake is a fun way to combine two things that make celebrations memorable: travel and food.
You don’t need elaborate decorating equipment or professional skills. Start with a simple cake, create a smooth buttercream base, and add a few carefully chosen edible gold and travel-inspired details.
The most important part is choosing decorations that tell a story. A tiny airplane can represent a dream trip, a destination sign can remember a favorite journey, and a simple map can turn an ordinary cake into a personal travel-themed centerpiece.
Whether you’re celebrating a birthday, New Year’s Eve, graduation, anniversary, or welcome-home party, this cake can be adapted to suit the occasion.
Start simple, choose a destination-inspired theme, use edible gold accents carefully, and let your travel memories become part of the celebration.